Skin Realism Checklist: Pores, Veins, Goosebumps
Ever wondered why some digital figures seem alive, while others don’t? It often comes down to the small, detailed aspects of our biology that we overlook.
Human skin is about 5.5% of our body mass, serving as a living canvas of unique textures. To achieve true visual fidelity, we must go beyond simple shaders and flat surfaces.
Mastering the placement of pores, veins, and goosebumps is key for high-quality ai output. This technical skill bridges the gap between synthetic assets and realistic skin realism. By focusing on these biological markers, you can take your creative projects to a professional level.
Key Takeaways
- Human tissue makes up about 5.5% of total body mass.
- Micro-details like pores are vital for authentic rendering.
- Veins and goosebumps add necessary depth to digital models.
- Biological markers help overcome the uncanny valley effect.
- Focusing on texture improves the quality of your synthetic assets.
Foundations of AI Porn Skin Realism
To master digital skin texture, you must first understand how light interacts with the human body. Human skin is not flat; it’s made of layers like the epidermis, dermis, and hypodermis. Each layer affects how we see color, depth, and feel texture.
When aiming for ai porn skin realism, you’re trying to mimic these biological structures. The epidermis is the outer layer, giving us the visual cues of the character’s surface. Knowing these layers helps avoid the plastic look often seen in basic AI.
Understanding Subsurface Scattering and Light Interaction
Subsurface scattering is key in rendering. It happens when light goes through a translucent object, scatters inside, and comes out somewhere else. In human skin, this creates the soft glow around ears or thin skin.
Without proper light interaction, models look flat and lifeless. Simulating light through the dermis adds depth, making the skin look organic. This technique is crucial for a convincing, fleshy look that mimics real physics.
The Role of High-Resolution Training Data
High-resolution training data is essential for capturing human skin’s complex nature. Without detailed data, AI struggles to replicate real skin imperfections. You need images with pores, fine lines, and natural color variations for a robust model.
Using high-quality inputs helps the system learn skin nuances well. When it understands these details, it can create results that feel real. The table below shows how different skin layers affect the final look.
| Skin Layer | Primary Function | Visual Impact |
|---|---|---|
| Epidermis | Surface Protection | Pores and fine texture |
| Dermis | Structural Support | Color depth and veins |
| Hypodermis | Fat Storage | Softness and volume |
Preparing Your Base Model for Texture Detailing
To master skin realism ai, start by preparing your base model. The quality of your model affects how it handles light and depth. Without a good base, even the best prompts won’t work well.
“The quality of your output is fundamentally limited by the architecture of your base model and the precision of your training data.”
Selecting Checkpoints Optimized for Skin Fidelity
Finding the right checkpoint is key. Look for models that focus on digital skin texture. These models keep natural imperfections that make skin look real.
Stay away from general models that smooth out too much. Choose ones that keep details sharp. This way, your high-resolution generation starts with a detailed canvas.
Utilizing LoRA Models for Micro-Texture Enhancement
With a solid base, add details with LoRA models. These models add small textures like pores and fine lines. They enhance digital skin texture without messing up your image.
Think of LoRA models as adding real skin effects. They make your image feel real and touchable. This method makes your work look organic and detailed.
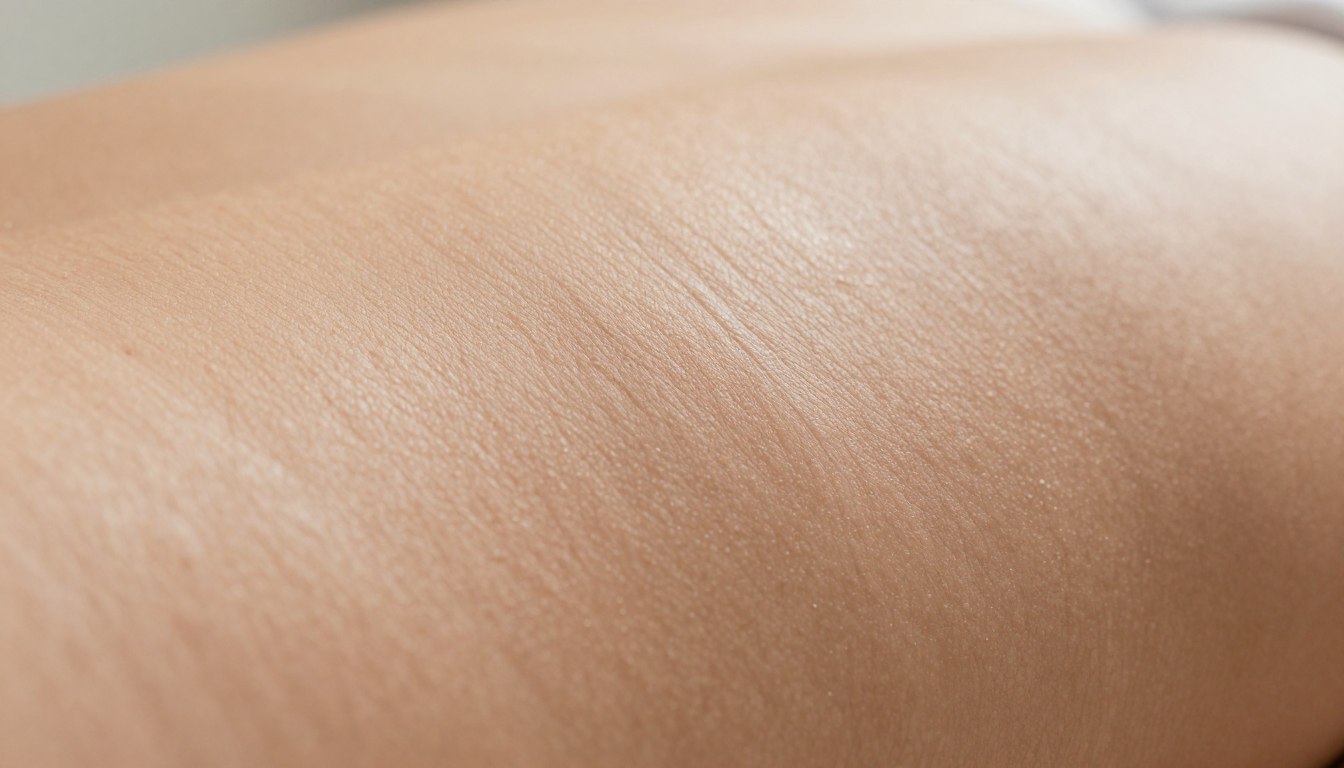
Mastering Pore Density and Skin Surface Variation
To achieve skin realism ai, understanding light and skin texture is key. Human skin’s texture changes a lot, from 2.3 mm on palms to 15 mm on thighs. By copying these natural changes, you can make digital characters look more real.

Prompt Engineering for Natural Pore Distribution
To avoid fake patterns, guide your model to create natural pores. Use specific terms in your prompts, like “varied pore size” or “anatomically accurate skin texture.” This tells the AI that skin is not flat.
Also, use negative prompts to avoid “smooth skin” or “airbrushed” looks. By asking for pore density variations, you get a more detailed surface. This makes the skin look real, not filtered.
Balancing Smoothness and Roughness in Skin Maps
Light and shadow work best when skin maps are balanced. Too smooth and it looks like plastic, too rough and it looks like stone. Adjust your maps for subtle highlights that catch light.
This balance is key for AI skin fidelity under different lights. When maps are right, skin looks soft and lifelike. This is crucial for top-notch character design.
Avoiding the Plastic Look in AI Generations
The “plastic look” comes from missing surface variation. Add subtle noise or grain to your textures to avoid this. Imperfections like tiny bumps or color shifts are what real skin has.
| Skin Region | Pore Density | Surface Texture | Light Reflection |
|---|---|---|---|
| Face (T-Zone) | High | Oily/Porous | Specular |
| Forearm | Medium | Fine/Dry | Matte |
| Thigh | Low | Smooth/Soft | Diffused |
| Palm | Very High | Ridged/Thick | Low Gloss |
Implementing Realistic Vein Mapping
The secret to lifelike digital skin lies in the veins beneath the surface. To get a natural look, you need to go beyond just skin texture. Focus on anatomical accuracy to turn a flat image into a believable character.
Anatomical Placement of Vascular Structures
Start your vascular mapping by finding where veins show up most. Look at the back of hands, forearms, temples, and feet. Placing veins in the right spots helps avoid the “uncanny valley” effect.
The hypodermis layer, which holds fat, adds depth and feel. Putting veins in this layer makes them look like they’re under the skin, not just on it.
Adjusting Opacity and Color Depth for Subdermal Effects
Realism comes from how light interacts with the skin. Use subsurface scattering to show how light goes through the skin and hits veins. If veins look too sharp or dark, they’ll seem like tattoos.
Changing the opacity of your veins is key. A soft, low-opacity look makes veins blend with the skin. Use this table to adjust based on how visible you want veins to be:
| Skin Type | Vein Visibility | Opacity Setting | Color Tone |
|---|---|---|---|
| Fair/Thin Skin | High | 35% – 45% | Cool Blue/Purple |
| Medium/Toned | Moderate | 20% – 30% | Muted Blue/Grey |
| Deep/Dark Skin | Low | 10% – 15% | Dark Brown/Deep Red |
By fine-tuning these settings, your character will look consistent and real. Always check how your subsurface scattering looks under different lights. This back-and-forth is crucial for top-notch digital work.
Creating Goosebumps and Skin Texture Imperfections
Realism comes from the small details, like the tiny bumps and grains on human skin. When your AI creations look too perfect, they miss that real touch. By adding micro-imperfections, you can make them feel more alive.
Triggering Piloerection Effects via Prompting
Piloerection, or goosebumps, adds emotion and depth to your work. Use keywords like “gooseflesh,” “raised skin follicles,” or “piloerection.” These tell the AI to make the skin look more real.
Use side or rim lighting to highlight these bumps. This makes them stand out against the skin. The way light interacts with texture makes the image look three-dimensional.
Layering Noise for Organic Skin Grain
A common problem with AI is a “plastic” look. To fix this, add a skin grain that looks like real skin. Layering noise breaks up smooth colors and adds detail.
Use prompts for “fine skin texture” or “dermal noise.” This keeps the skin looking detailed even up close. It makes the image feel more authentic and real.
| Technique | Primary Benefit | Visual Impact |
|---|---|---|
| Piloerection Prompting | Adds physical depth | High relief |
| Noise Layering | Reduces digital smoothness | Organic grain |
| Pore Density Control | Enhances realism | Natural skin look |
Advanced Detailing Workflow for Skin Realism
To achieve professional skin realism, you need more than just simple prompts. A structured detailing workflow helps manage complex textures. This ensures every skin layer gets the right attention for a realistic look.

Integrating ControlNet for Precise Texture Placement
ControlNet connects your vision to the final image. It keeps textures in place, especially in high-resolution generation. This is key to avoiding texture issues.
Using depth maps or Canny edge detection helps the AI respect the model’s anatomy. This precision stops textures from blurring. It ensures pores and fine lines are in place before the final image is rendered.
Using Inpainting to Refine Localized Skin Details
Even with great initial images, some areas need extra work for photorealism. Inpainting is like a surgical tool for these details. It lets you focus on areas like cheeks, nose, or hands.
This method is crucial for fixing flat or unnatural-looking areas. By focusing on specific zones, you add complex details. This makes the image highly detailed and realistic.
Color Grading and Tone Mapping for Lifelike Skin
Color grading is the last step to make your digital subjects look real. It makes sure the skin doesn’t appear flat or fake under different lights. By tweaking the color balance, you can turn a simple render into a believable portrait.
Correcting Skin Undertones and Blood Flow Simulation
Getting the skin undertones right is crucial for a natural look. Human skin has layers of color that change with blood flow. Use vascular mapping to add color shifts where veins are visible.
Adjusting these colors makes your character look alive. It’s important to match the lighting in your scene. This brings out the vitality that AI often misses.
Applying Global Lighting Adjustments for Realism
Global lighting helps your subject blend with the background. If the skin tones don’t match the light, it looks like the subject is stuck on. Tone mapping helps balance the light and dark areas, making everything look cohesive and lifelike.
Good lighting stops the skin from looking too plastic or pale. By controlling contrast and color, you create a seamless look. This step is essential for a top-notch finish in your digital art.
Post-Processing Techniques for Enhanced Texture
To get skin that looks real, you need more than a good prompt. You also need a detailed post-processing workflow. Even the best AI portraits can get better with some tweaks. This makes sure your work looks great up close.
Upscaling Strategies to Preserve Micro-Details
Upscaling an image means keeping its skin texture sharp. Regular upscalers can make skin look fake. Instead, use AI tools that keep the small details sharp.
Tools like Topaz Photo AI or Magnific AI help keep pores looking natural. Maintaining these micro-details is key for a real look. Higher resolution makes skin’s small flaws stand out, making it look more real.
Sharpening and Clarity Adjustments in External Editors
After upscaling, use editors like Adobe Photoshop or Lightroom for fine-tuning. You can sharpen the skin’s surface without adding bad details. Make sure to mask the background to avoid mistakes.
Use the clarity or texture sliders to highlight the natural skin grain. These steps are vital for a pro finish. Here are some tips for your post-processing:
- Use high-pass filters to sharpen skin details without losing color.
- Add a subtle noise layer to make the skin grain look consistent.
- Adjust local contrast to make pores and lines stand out.
- Work on a non-destructive layer to keep your original detailing workflow.
By following these steps, your AI skin will look natural and real. These small changes make a big difference between digital and high-end photography.
Common Pitfalls in AI Skin Generation
Creating professional digital art means spotting common mistakes. When aiming for top-notch ai porn skin realism, small errors can ruin your work. Catching these mistakes early is key to improving as an artist.
Identifying Over-Smoothed Textures
One big problem is when skin looks too perfect or plastic. This usually happens when you overdo the denoising. It removes the natural pores and lines that make skin look real. Over-smoothing makes your model look fake.
To fix this, add back some noise or sharpen your image. Adding grain to texture maps brings back the skin’s natural feel. Always check your work at full size to keep those small details sharp.
Correcting Unnatural Specular Highlights
Specular highlights that don’t look right often come from bad lighting. If they look like shiny plastic dots, your lighting or material settings are off. Getting these right is key to simulating how light interacts with skin.
Adjust these highlights by tweaking the specular map or light intensity. Softening the light makes transitions between light and dark areas look more natural. Getting this right will make your ai porn skin realism much better.
Testing and Iterating Your Skin Realism Pipeline
Creating skin realism ai needs a careful testing and improvement cycle. Building a strong pipeline takes time and effort. It grows as you analyze and refine each output.
Having a clear workflow helps your digital art get better with each try. This way, you move closer to perfection with every attempt.
Developing a Consistent Evaluation Checklist
To keep high standards, you need a way to measure your progress. A checklist helps you focus on the technical details of anatomical accuracy. It lets you check your work systematically.
| Evaluation Metric | High Fidelity | Needs Improvement |
|---|---|---|
| Pore Distribution | Organic and varied | Uniform or tiled |
| Subdermal Depth | Soft, layered tones | Flat or muddy colors |
| Specular Highlights | Natural, soft reflections | Harsh, plastic-like glare |
“Quality is never an accident; it is always the result of high intention, sincere effort, intelligent direction and skillful execution.”
Refining Prompts Based on Visual Feedback
Use your checklist to understand the feedback from your AI. If an area lacks anatomical accuracy, focus on that in your prompts. You might need to tweak the texture or add new keywords for better results.
This back-and-forth process is key to mastering skin realism ai. Documenting what works helps you build a library of successful prompts. Stay patient, keep testing, and let the data lead your creative journey.
Conclusion
Mastering skin realism is about combining technical skill with a deep understanding of biology. You now have the tools to turn simple textures into stunning, lifelike surfaces that grab attention.
Creating high-quality skin results means balancing undertones with natural irregularities. Focus on keeping small details sharp to ensure your characters look real up close.
Tools like Stable Diffusion and Midjourney can greatly enhance your work. By honing these advanced techniques, you’ll stand out in a crowded field.
Don’t stop exploring new ways to light and texture your work. Share your progress to get feedback and new ideas. Your quest for perfect skin is a continuous journey of learning and growth.
FAQ
Why are biological markers like pores and goosebumps essential for skin realism ai?
Biological markers like pores and goosebumps are key to making digital skin look real. They help avoid the “uncanny valley” effect. These details tell our brains the image is real, not just digital.
Mastering these details makes your digital assets look professional and lifelike.
How does subsurface scattering (SSS) affect the appearance of digital skin layers?
Subsurface scattering makes digital skin look more like real skin. It simulates how light interacts with the skin’s layers. Without it, skin looks fake.
Understanding this interaction helps create a lifelike glow and depth. It makes the skin look like it has blood flow and tissue beneath the surface.
Which base models and LoRAs are best for high-resolution skin textures?
For photorealistic skin, use models like Juggernaut XL or Realistic Vision. For extra details, add LoRA models from Civitai. This combo is essential for professional skin details.
How can I prevent my AI-generated skin from looking like smooth plastic?
To avoid the “plastic look,” use prompts that include natural pore density and texture. Balance smooth and rough textures in your prompts. This ensures light reacts naturally to the skin’s surface.
Where is the best anatomical placement for vein mapping in AI portraits?
Focus on areas like the temples, wrists, and the back of the hands for vein accuracy. Adjust vein opacity and color to simulate blood circulation. This gives the skin a sense of vitality.
How do I trigger realistic goosebumps or “piloerection” effects?
Use specific prompts to trigger goosebumps and layering noise for skin grain. Request “goosebumps” or “chilled skin texture” in tools like Stable Diffusion. This creates realistic skin texture.
What role does ControlNet play in a professional detailing workflow?
ControlNet gives you control over textures and details. Use Canny or Depth maps to guide the AI. Then, refine areas with Inpainting for precise details.
How can I correct skin undertones to simulate realistic blood flow?
Real skin has temperature shifts. Use Adobe Lightroom or NVIDIA Canvas to adjust color. Warm undertones in areas like cheeks and ears make the skin look more vibrant.
What are the best upscaling strategies for preserving micro-details in skin?
Use a “tiled” upscaling or tools like Topaz Photo AI or Magnific AI. These tools enhance skin details like hairs and cells, preserving texture.
How do I identify and fix unnatural specular highlights on the skin?
Unnatural highlights look oily or metallic. Look for “blown-out” white spots. Refine specular maps or use negative prompts for a matte finish.
Why is a consistent evaluation checklist important for AI skin generation?
A checklist ensures you check for symmetry, texture, and lighting. Regularly inspect pores and vein placement. This helps improve your AI skin generation.
Can I achieve professional skin realism without external post-processing?
While AI models are powerful, professional skin realism often needs post-processing. Combine AI generation with Adobe Photoshop for sharpening. This fine-tunes your output to meet industry standards.