Camera Paths 101: Orbit, Dolly & Handheld Simulation
Ever noticed why some digital scenes feel flat, while others draw you in? It’s often about how you move the camera. By using professional-grade motion, you can turn still images into engaging experiences.
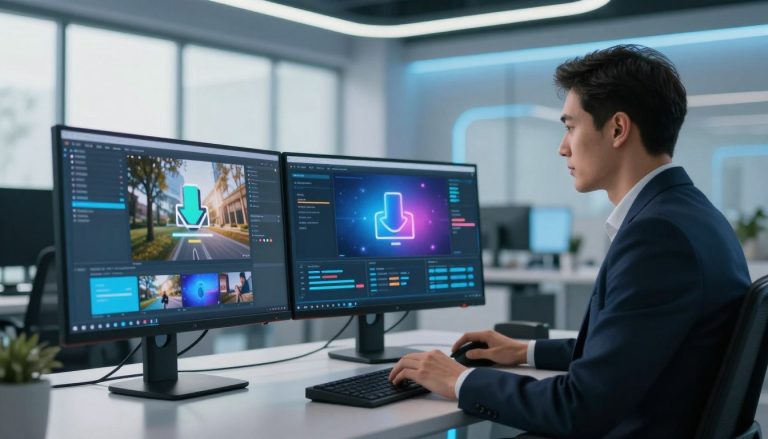
This guide will teach you the key to moving your content. We’ll show you how to use ai porn camera paths to tell better stories and keep viewers interested. Whether it’s an orbit, a dolly, or a handheld shot, these basics are crucial for today’s creators.
Key Takeaways
- Learn to manipulate virtual space for better storytelling.
- Understand the difference between orbit, dolly, and handheld styles.
- Discover how movement increases viewer retention and immersion.
- Master the basics of professional motion simulation.
- Apply these techniques to create dynamic, high-quality digital scenes.
Understanding the Fundamentals of AI Porn Camera Paths
Camera movement is like a secret path that connects your AI subjects to the viewer. It’s any change in the camera’s spot or view. These changes make a still image come alive.
Knowing how to use these techniques lets you control where the viewer looks. This makes the story feel more real and engaging.
The Role of Virtual Cinematography in AI Generation
Virtual cinematography is like having a digital film crew. You don’t have to worry about a physical studio or a fixed camera. You can move the virtual lens to get shots that are hard to get in real life.
To use ai porn camera paths well, think like a director. Decide when to zoom in for close-ups or pull back to show the setting. This skill makes your videos look professional.
How Camera Movement Influences Viewer Engagement
The way a camera moves affects how viewers feel. Slow, steady shots can make things feel calm. Fast, shaky shots can make things exciting. You can change the mood of your video by changing how the camera moves.
Here’s a table showing how different camera movements affect viewers:
| Movement Type | Primary Effect | Viewer Impact |
|---|---|---|
| Static Shot | Stability | Observation and detail |
| Dolly In | Intimacy | Increased emotional connection |
| Orbit | Depth | Dynamic spatial awareness |
| Handheld | Realism | Urgency and authenticity |
Your choice of camera movement should always help tell the story. When you match your technical choices with the story’s mood, your viewers will stay engaged.
Setting Up Your AI Video Generation Environment
Making professional AI videos needs more than just creativity. It also needs a well-organized workspace. A reliable workspace lets you predict how your camera path ai will work. This is key to making your ideas into smooth, movie-like scenes.
Selecting the Right AI Tools for Motion Control
Not all platforms are the same when it comes to motion control. Look for tools that let you fine-tune focal length, pan, and tilt. Choose software that takes specific coordinate inputs for consistent visuals.
Here’s a table to help you pick the right AI video tools:
| Feature | Basic Tools | Advanced Motion Control |
|---|---|---|
| Path Precision | Low | High |
| Keyframe Support | None | Full |
| Camera Path AI | Limited | Advanced |
| Render Stability | Moderate | High |
Preparing Your Prompts for Consistent Camera Behavior
Your prompts tell the AI what to do. For consistent camera behavior, use clear, detailed language. Say things like “dolly forward,” “pan left,” or “orbit around subject.”
Organize your prompts in a logical order. Put your motion control instructions first. This helps the AI understand your plan better. By doing this, you avoid shaky movements and get a polished video.
Mastering the Orbit Shot for Dynamic Depth
To make scenes come alive, learning the orbit shot is key. This method lets your camera move around a subject, boosting depth perception. With advanced camera path ai, you can make scenes feel three-dimensional, keeping viewers hooked.

Defining the Orbit Path in Prompt Engineering
To get a perfect circle, you need to be good at prompt engineering. Clearly tell the AI how the camera should move around the subject. Use phrases like “camera orbiting around the subject” to help it understand.
Being consistent is crucial. Make sure your prompts cover the start and end of the camera’s path. This keeps the AI on track, avoiding any wobbles from the intended circular path.
Adjusting Radius and Speed for Cinematic Impact
Every cinematic move needs the right mix of speed and distance. A close orbit feels intense, while a wider one is more epic. Play with these settings to match your scene’s mood.
Changing the speed is also vital for quality. If it’s too fast, the AI might miss details. Start slow to let it capture every angle smoothly.
Avoiding Distortion During Circular Movements
One big challenge is avoiding warping or morphing. Keep your subject in the center of the frame. Stability is key when the camera moves, helping the AI stay focused.
If you see distortion, try simplifying the scene. A less busy background lets the AI concentrate on the camera’s path. This tweak can make your shot look much better.
Executing the Dolly Shot for Narrative Focus
A well-executed dolly shot makes your video feel more real. It uses a virtual camera on wheels for smooth movement. This helps viewers feel like they’re moving with the camera.
Dolly In vs. Dolly Out Techniques
Deciding between dolly-in and dolly-out changes how your scene feels. A dolly-in brings the viewer closer, making scenes more personal. A dolly-out shows more of the scene, changing the mood to bigger and more epic.
- Dolly In: Use this to build tension or emphasize a character’s internal state.
- Dolly Out: Use this to provide a sense of closure or to show the scale of a setting.
Maintaining Subject Stability During Forward Motion
Keeping the subject stable while moving is a big challenge. If the background moves too much, the subject can look distorted. Make sure your motion control keeps the subject in the center.
Try to move slowly. Fast movements can confuse the AI, causing problems. Slow, steady movement helps the AI track the subject better.
Managing Focal Length Changes During a Dolly
Changing the focal length during a dolly shot can change how deep things look. Zooming in or out while moving can create a cool effect. This effect keeps the subject stable while changing the background.
Changing the focal length needs to be done carefully. Quick changes can lose the viewer’s interest. Practice small changes to keep your video looking great.
Simulating Handheld Camera Movement for Realism
To make AI videos feel real, you need to master handheld simulation. This means copying the small mistakes a human camera operator makes. It turns cold, lifeless videos into ones that feel real and genuine.
Adding Organic Shake and Jitter to AI Clips
To get a documentary look, add organic shake to your videos. Most AI video tools let you add noise or jitter to make it feel like a handheld camera.
Go for small, slow movements instead of fast, wild ones. This makes the camera movement look like a choice, not a mistake.
Balancing Realism with Visual Clarity
Moving the camera is key for realism, but don’t lose sight of clarity. Too much jitter can cause blur or distractions that pull you away from the story.
Keep the shake level just right. If your subject is moving fast, cut back on the organic shake. This helps keep the AI focused on the character and background.
When to Use Subtle vs. Aggressive Handheld Effects
The right amount of handheld simulation depends on the scene’s mood. For quiet, close-up moments, use just a hint of movement. It keeps things cozy and personal.
But for fast-paced or tense scenes, go big with the camera movement. This contrast makes the video feel more alive and impactful.
Combining Camera Paths for Complex Sequences
You can make your stories more engaging by mixing different camera paths. This creates a deeper experience for your viewers. Strategic planning is crucial for smooth transitions.
Transitioning Between Dolly and Orbit Movements
Mixing a dolly shot with an orbit shot adds depth to your content. Start with a steady move towards the subject. Then, switch to a circular path.
This keeps the focus on the subject while offering a new view. Make sure your prompts handle the change in camera movement well. A slow push-in followed by a rotation can create a polished look.
Layering Motion Effects for Professional Results
Adding multiple effects can make your stories more detailed and engaging. A subtle shake on a dolly shot adds realism. An orbit shot can reveal hidden details as it moves.
The table below shows how different combinations affect your video:
| Combination | Primary Effect | Best Use Case |
|---|---|---|
| Dolly + Orbit | Dynamic Depth | Character Introductions |
| Handheld + Dolly | Raw Realism | Action Sequences |
| Orbit + Zoom | High Intensity | Dramatic Reveals |
Try out these combinations to find your style. Remember, camera movement should enhance the story, not take away from it. With practice, you’ll get the hang of creating professional content.
Troubleshooting Common AI Camera Path Issues
When your AI clips start to change shape or warp, it’s time to tweak your tech. Even pros face problems like morphing, artifacts, and subject warping with ai porn camera paths. These issues happen when the AI has trouble keeping things steady from frame to frame.
Fixing Morphing and Artifacts During Movement
Morphing happens when the AI loses the subject’s shape during a change. To fix this, make sure your camera path ai settings aren’t too fast. Quick movements can mess up the AI’s vision, causing unwanted visual noise.
Even old tricks like the dolly zoom need careful control. When you use these, keep your speed steady to avoid jagged artifacts.
Correcting Unintended Subject Warping
Subject warping shows the AI’s poor depth perception. If the background moves too fast, the AI stretches the subject. To keep things stable, place your subject in the center of the frame.
Good lighting and clear textures help the AI see the subject clearly. This is key for realistic looks during complex movements.
Refining Prompt Weights to Stabilize Camera Paths
Good prompt engineering helps fix shaky motion. By making the AI focus more on the subject, you improve subject stability in fast scenes.
Here’s a table to help you fix common problems:
| Issue | Primary Cause | Recommended Fix |
|---|---|---|
| Morphing | High movement speed | Reduce camera velocity |
| Subject Warping | Poor depth perception | Adjust prompt weights |
| Artifacts | Low frame consistency | Increase denoising strength |
| Jittery Motion | Unstable camera path ai | Use smoother interpolation |
By making these systematic adjustments, you’ll get better results. Regular prompt engineering leads to smoother, more cinematic projects.
Advanced Techniques for Cinematic Motion
To take your digital work to the next level, you need to go beyond basic camera moves. Learning advanced tools lets you turn simple clips into stunning virtual cinematography. This way, you can create complex scenes that were once thought impossible.
Utilizing Motion Brushes and Regional Control
Advanced users can use motion brushes to add movement to specific parts of a frame. This regional control lets you focus on a subject or background, making your cinematic move precise. You can control each layer in your scene, not just the whole image.
This fine control is key for top-notch visual storytelling. By choosing which parts of the image move, you avoid messing up the still parts. This makes your final product look much better.
Synchronizing Camera Paths with Subject Action
To create a truly immersive experience, your camera and subject must move in sync. Using dolly crane shots, which move both horizontally and vertically, adds depth and scale. This is more than what a simple orbit shot can do.
To get it right, match your camera’s speed with the subject’s movement. Synchronizing these elements keeps the viewer engaged with the story, not distracted by the tech. When the camera moves smoothly with the action, your project looks professional and polished.
Optimizing Your Workflow for High-Quality Output
A well-organized production pipeline is key to consistent, top-notch AI-generated cinematography. By structuring your creative process, you cut down on wasted time and effort. This ensures every frame meets your high standards. Efficiency lets you dive deeper into the artistic aspects of your project, not get bogged down by technical issues.

Iterative Testing and Prompt Refinement
Prompt engineering is at the heart of successful AI video creation. View your first generation as a draft, then tweak your parameters to enhance subject stability. Even small tweaks to your prompts can lead to big improvements in how the AI captures movement.
Keep track of your successful prompts to build a reliable library. This helps you anticipate how the AI will respond to certain commands. By refining your inputs, you gain more control over the final visuals, keeping your creative vision on track.
Managing Render Times and Resource Allocation
Effective production balances your hardware with the complexity of your scenes. Just as studio dollies like the Chapman Titan II offer precise motion control, your software workflow needs similar finesse. Smartly allocating computing resources is crucial to avoid long rendering times.
Consider breaking down complex scenes into smaller clips to keep performance high. Test complex dolly shots on lower resolutions first to check the path. This approach saves time and prevents the disappointment of high-resolution renders with unwanted flaws.
| Workflow Stage | Primary Goal | Efficiency Tip |
|---|---|---|
| Prompting | Accuracy | Use iterative testing |
| Rendering | Speed | Batch process clips |
| Review | Quality | Check subject stability |
| Refinement | Precision | Adjust motion control |
Best Practices for Professional AI Cinematography
Professionalism in virtual cinematography means blending movement and style smoothly. To improve, go beyond simple generation. Adopt a structured approach to your creative work.
Maintaining Visual Consistency Across Multiple Clips
Consistency is key to a polished project. When creating multiple clips, keep lighting, colors, and details consistent. This makes your project look cohesive.
Using fixed seed numbers and consistent prompts helps keep things stable. Visual storytelling needs viewers to feel connected to your world. If the look changes too much, it disrupts this connection.
Try a unified color grading in post-production to link different clips. This simple step makes every cinematic move seem part of a unified vision.
Developing Your Unique Visual Style
Your unique voice sets your work apart from generic AI. Experiment with camera behaviors to find what suits your narrative focus.
Looking back, F.W. Murnau’s 1924 film The Last Laugh shows the power of camera techniques. His use of dolly shots mirrored character experiences, changing how directors work.
“The camera is not just a recording device; it is an extension of the human eye and the storyteller’s intent.”
By using classic principles, you can make your handheld simulation feel natural. Whether it’s fast action or slow pans, your choices should enhance the story’s emotional core. Creating a distinct style takes time but makes your AI video stand out.
Conclusion
Your journey into virtual production changes how you tell stories. By learning orbit and dolly movements, you control the story’s look. This lets you create a unique visual experience for your audience.
Adding handheld simulation to your work makes it feel real. It keeps viewers engaged in the scene. Using organic shake correctly makes your footage look natural, not fake.
Tools like Runway Gen-2 or Pika Labs are great for creators who love movement. Keep trying out these tools to find your style. Playing with different motion settings lets you explore new video possibilities.
The world of AI video is always changing. Stay open to new ideas to keep your content fresh. Use these tips for your next project. Watch as your digital stories become more vivid and cinematic.
FAQ
What is a camera path ai and how does it improve my video quality?
A camera path ai is the path a virtual lens follows in an AI world. It makes your videos look more professional by moving the camera in a smooth way. This makes your content feel more engaging on sites like Runway or Luma Dream Machine.
How do I execute a perfect orbit shot without causing subject distortion?
To get a great orbit shot, plan a clear circle path in your prompt engineering. Adjust the radius and speed to avoid morphing or warping. Use regional control tools to keep the subject steady as the camera moves around it.
When should I choose a dolly-in versus a dolly-out movement?
Choosing between a dolly-in and a dolly-out depends on what you want to show. A dolly-in brings the subject closer, making it more intimate. A dolly-out shows more of the scene, slowly revealing it. Keep an eye on focal length to avoid blurry backgrounds.
How can I add a handheld simulation without creating motion sickness?
To make it feel like a real camera, add organic shake and slight jitter. Tools like Pika Labs help you fine-tune this. Aim for a documentary feel that’s real yet clear enough to follow.
What is the best way to fix morphing and artifacts during complex camera paths?
Even with camera path ai, artifacts can pop up. Fixing them involves tweaking prompt weights and testing over and over. If something starts to warp, try lowering the motion or use a motion brush to control specific parts of the image.
How do motion brushes and regional control enhance cinematic motion?
Advanced users of Runway Gen-3 Alpha use motion brushes to match camera moves with subject actions. This lets you guide the AI to animate only the parts you want, making the camera follow naturally.
How do I manage render times and resources while testing different camera paths?
To make high-quality AI videos, work smart. Use low-res previews for testing and refining. This saves GPU resources and credits for the final, high-quality version.
How can I develop a unique visual style across a series of AI clips?
To keep your AI videos looking consistent, stick to lighting prompts and camera movement rules. Add specific motion effects and keep your camera moves intentional. This creates a unique style that stands out in the AI video world.